To create a running head and number your pages in Microsoft Word, follow these steps:
1. Go to the Cover Page of your document.
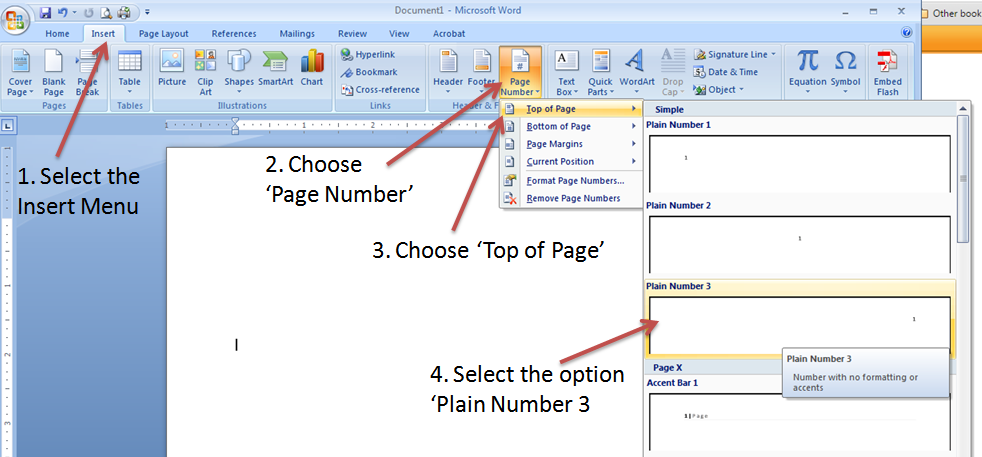
2. Choose the Insert menu.
3. Select Page Number, then Top of Page.
4. Choose Plain Number 3 from the list of options. The page number will now show up in the document header.
5. Place your cursor right in front of the page number in your header and type the abbreviated title of your paper in ALL CAPS just in front of the page number.
6. Press the tab key twice to move the abbreviated title to the left. The page number should remain on the right.
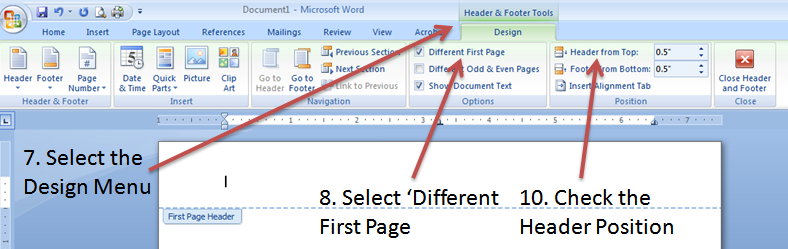
7. While still keeping your cursor in the header area, click the Design menu.
8. Check the box for Different First Page. You will now see a blank header on your cover page. This allows you to have a different header.
9. Type Running Head: YOUR PAPER TITLE. This will appear at the left side of the header. The paper title should be typed in ALL CAPS.
The subsequent pages of your paper will have only the abbreviated title and the page number in the header, while the cover page will now have the Running Head and no page number.
10. Check the font size and style of your headers. They should be 12 pt Arial or Times New Roman. Also, check the Header From Top position in the Design menu. The header distance should be 0.5".